Showing posts with label stone. Show all posts

Saturday, December 09, 2006

Sandstone thoughts, continued

The steps from a wider angle:

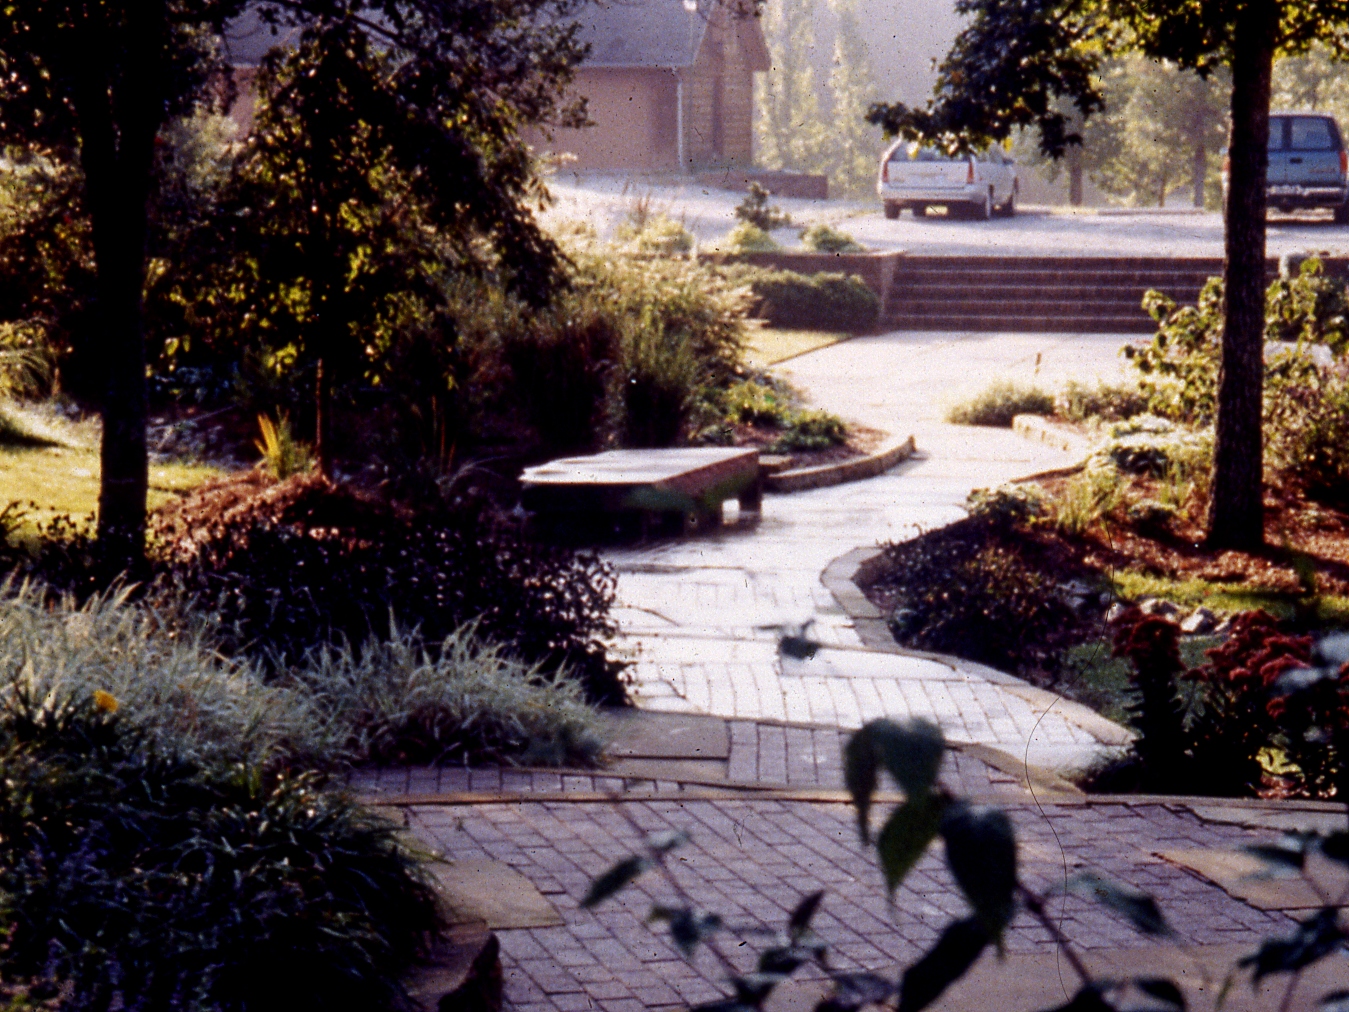
On 12/7 I posted a close-up of the stone steps, showing some of the detail. I was after a look of strong yet informal steps that led out on to the lawn.

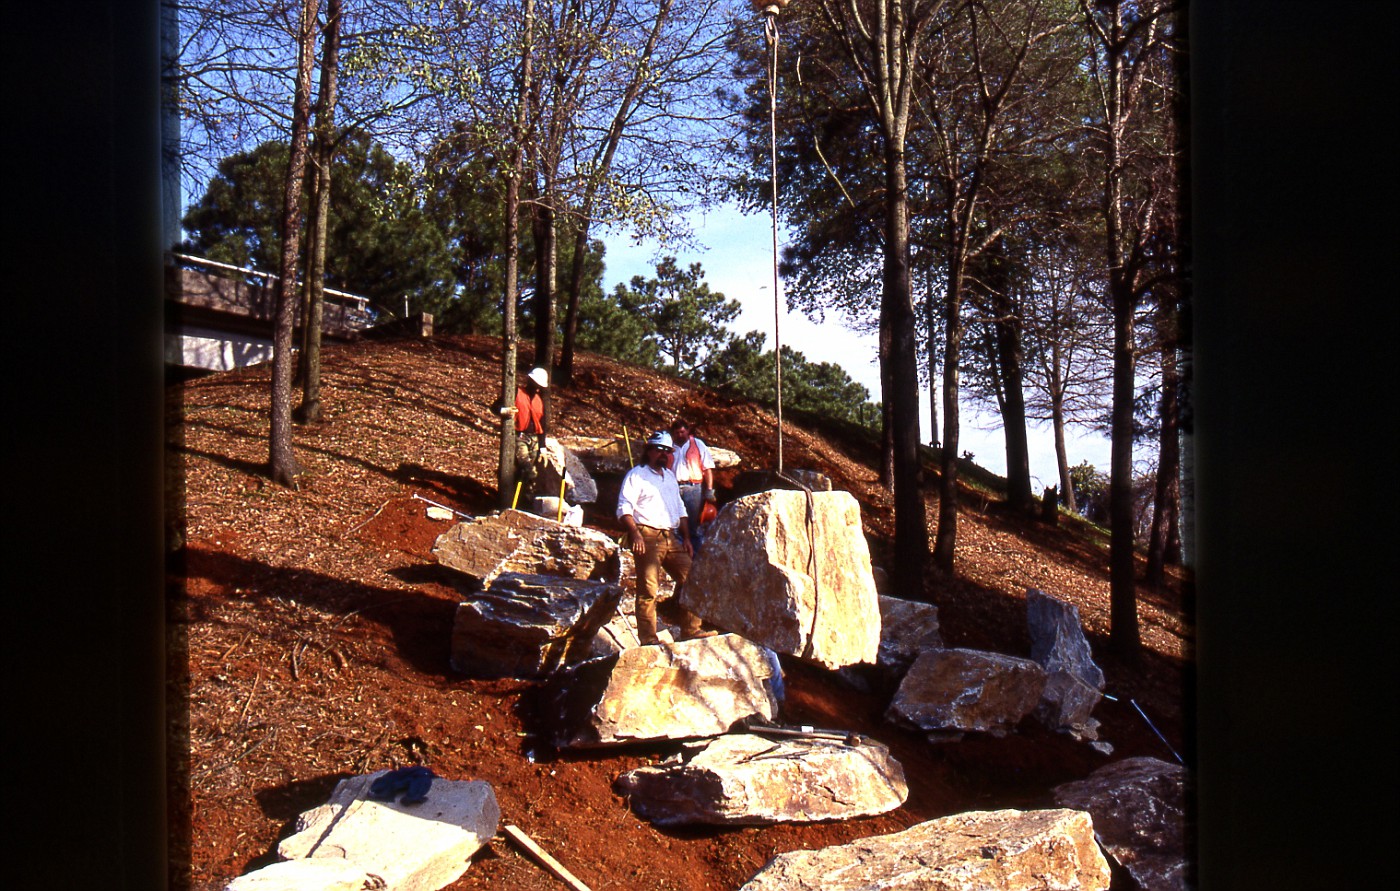
These steps are the only way to get from the parking court and upper terrace to that front lawn. The large barnstone on the left was needed to hold up the planting bed. This bed was designed in to screen the view of the cars from the street. and create a buffer of green between the view and the asphalt.

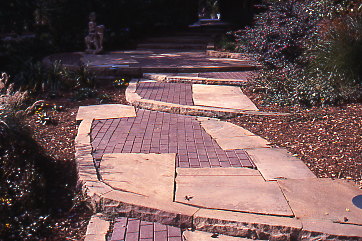
The bed swirls on the right before working back into another small wall that took advantage of stone found on the property. This wall was built to hold up the planting bed and upper terrace walkway and patio.


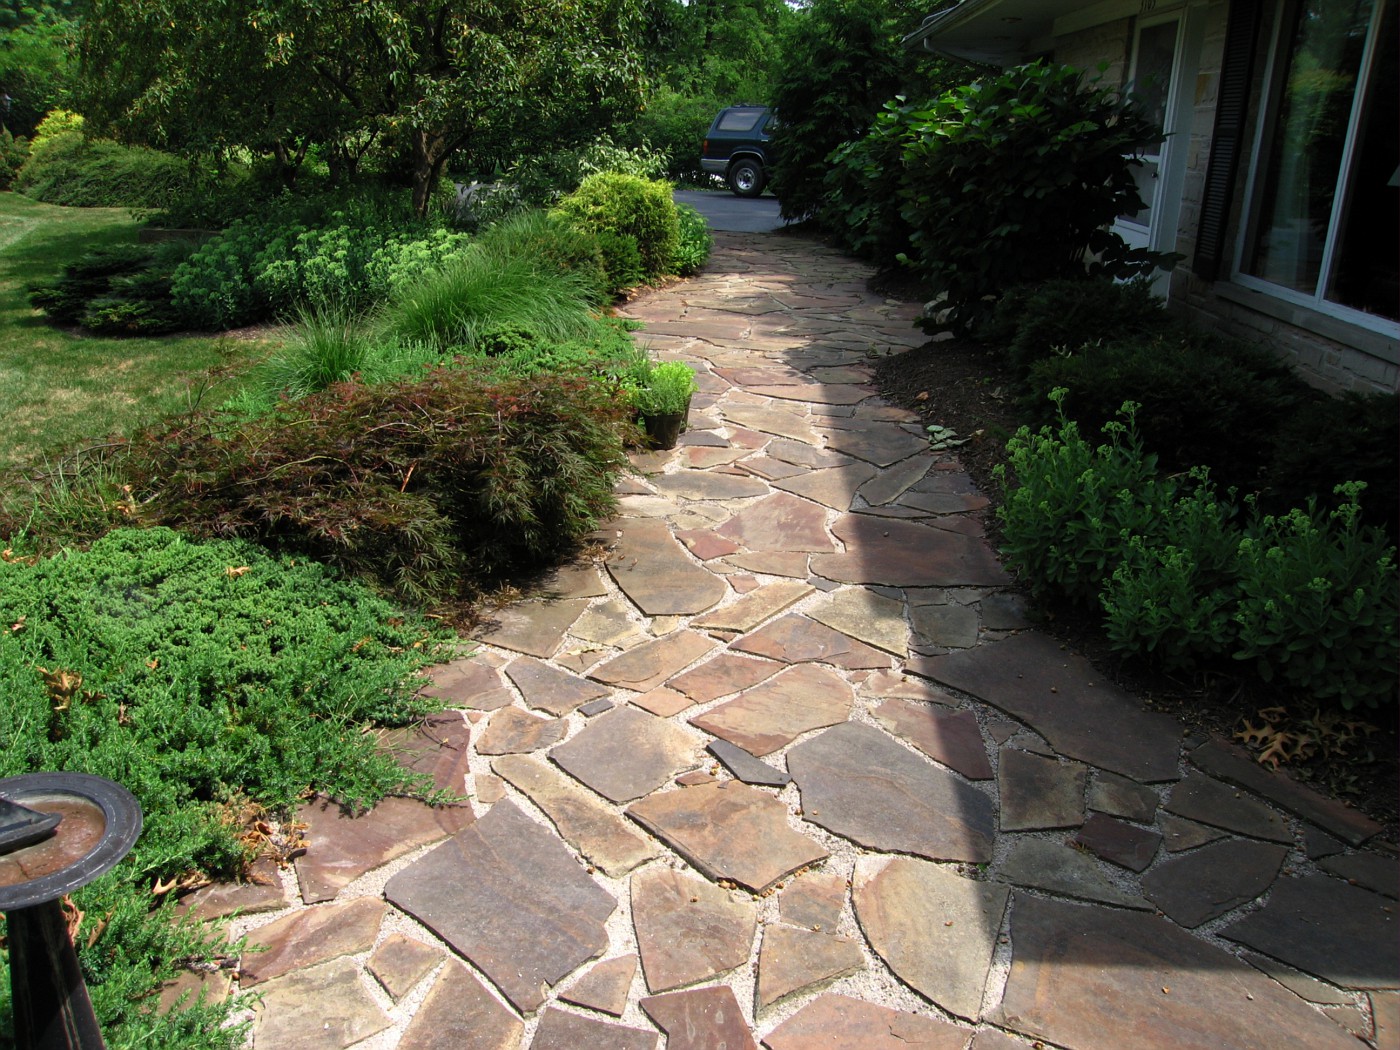
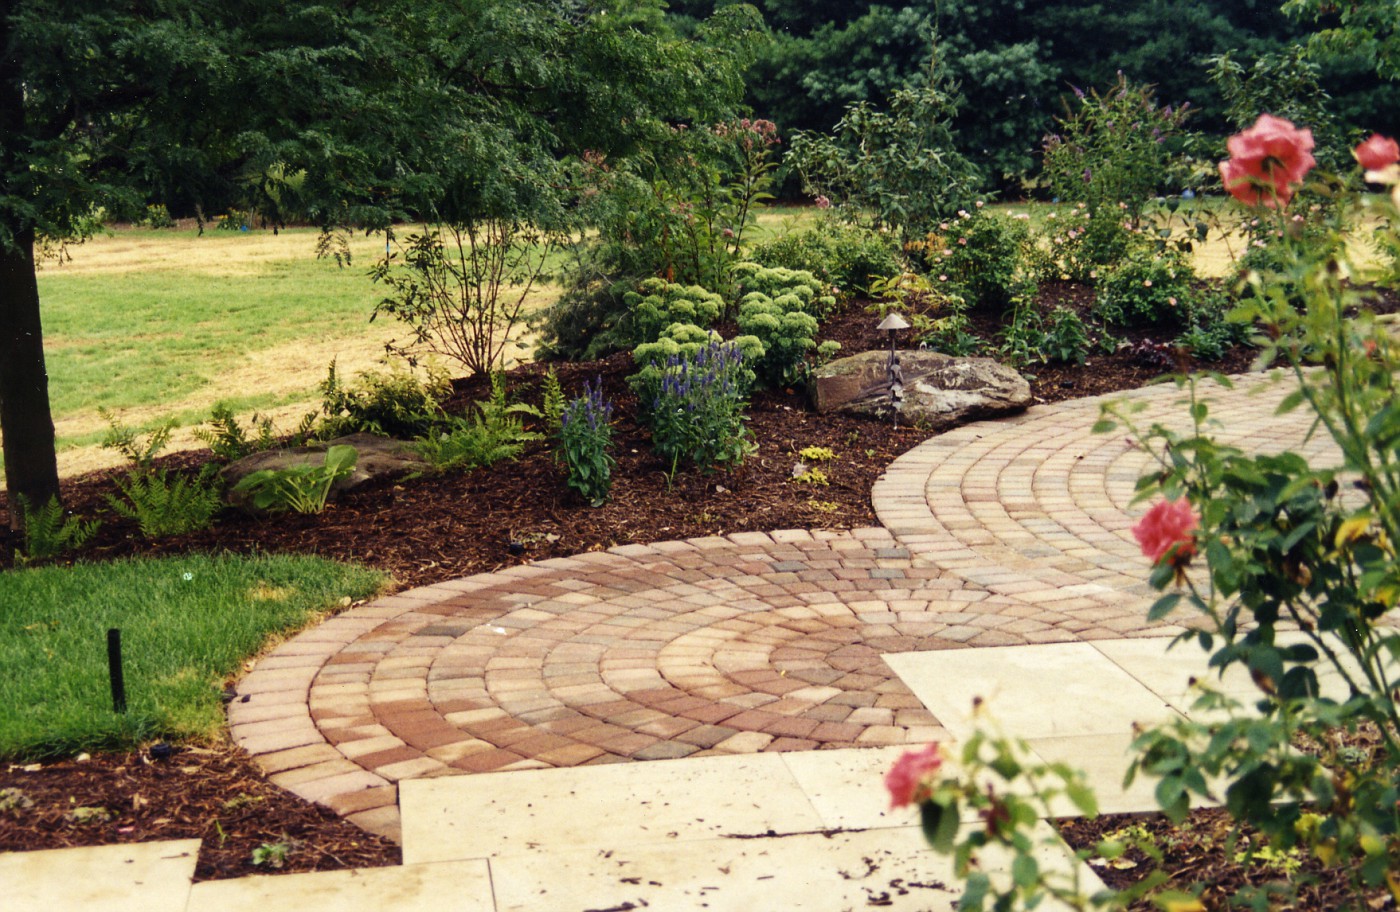
The view from here show the upper terrace. This is a flat stone called Maryland chocolate set on a bed of limestone dust and screenings. The steps are at the far end of this patio between the Crabapple trees. If I remember correctly these are "Sugar Tyme' Crabs.

I would like to point out these pictures were taking last summer, the Summer of 2006, and this job was installed in the Spring of 2000. The patio has held up quite well, and most of the plants are still in the same place we planted them 16 years ago.

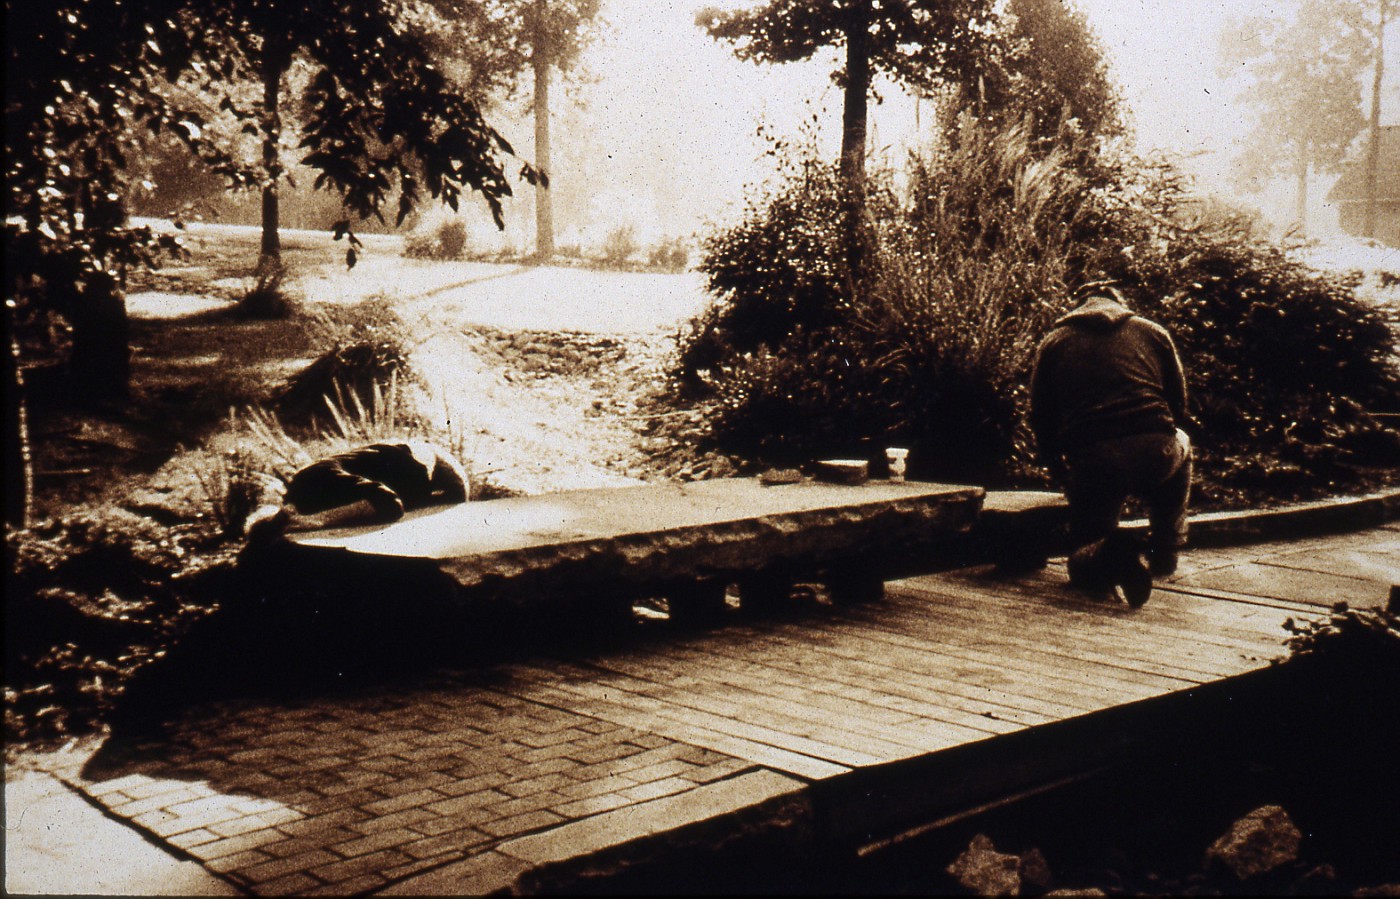
I had an opportunity to chat with one of the homeowners. She had pulled in when I was shooting these pictures. We talked about several things and she mentioned how happy they had been with everything all these years. I had to tell her they had done a great job with the upkeep and that everything still looked great.


This view shows a better look at the short wall that holds up the small bed and terrace. The beds; after 16 years, look fairly tidy.

Thursday, December 07, 2006

Sandstone thoughts


"Without discipline, there's no life at all." -Katherine Hepburn

powered by performancing firefox

Monday, December 04, 2006

Stone and Paver Walkway, Answers to Questions

This continues the story from Sundays post on The Appreciation of Stone. I've been asked a few questions and will attempt to answer them here:

  • The stone and brick are not the same depth. The stone was placed 1st and the pavers were poured around the stone.
  • The stone is a waste product from Briar Hill Quarries near Glenmount, Ohio. They use to refer to this product as: 3" offset. Briar Hill has changed the way they cut blocks of stone and they don't have much of this product on hand now.
  • The wall stone is also a Briar Hill product. They sell several different sizes of this wall stone. It can be used as a freestanding wall, or a retention wall. Seen here it makes beautiful risers for outdoor steps.
  • This was in South Carolina about 30 miles above Columbia. Yes, that means we shipped a semi-load of stone down to install the walkway.
  • This photo, and Sundays were taken about 2 yrs after the job was installed.
  • The slab-bench photo was taken right at the end of initial installation.
  • Yep, the pavers are brand new, and very architectural in style (clean edges and lines). Complete opposite of the rough and tumble sandstone. I was looking to mix opposites together to create strong visual interest.
  • The entire length was over 120 feet and did vary width wise 5 to 8 feet with that landing.
  • The landing was built to display art and as a visual resting spot, It was not built to hold furniture, or to become a patio. After two years it was still that way.
  • The original request was to create a visual entertaining walkway from the parking court at the front of the house to the pool house on the other side of the service drive. You can see the opening to the pool area at the end of the walkway in that small patch of light in the dark area (top center).
  • I'm still looking for the drawings for this project. I have the original concept drawings, and they are buried away somewhere.
I think that's everything that was asked of me. I enjoyed the project very much the client was actually very easy to work for, and they enjoyed the final product. Most of the plantings were installed at the initial phase, we went for perennials and a few shrubs that would adapt to beds without irrigation.

The only questions I don't want to get in here are the cost of the install. I hope the questioner will understand. Yes I do charge an hourly rate but when working away from the home base area I have daily and weekly rates along with expenses.

Thanks for all the interest, and questions. I'll keep looking for the drawings . . .

Sunday, December 03, 2006

An Appreciation of Stone 19

Monday, November 27, 2006

More on the Sandstone Bench

From the yard, a look before final facing
Comments, e-mails, even a phone call. Thought I would show a few more shots of this rather large bench. You can see part of the walkway, a combination of pavers, sandstone slabs, and wood for the bridge.

A look from top of walkway:
This is a look of the project/walkway in the fall, you can see down to the bench on the left. I was asked to create a pleasant walkway from the front of the house to the pool house.

The client was very adamant in her desire that the walk would be interesting, and those visitors getting out of their vehicles would be able to look over to a very pleasant scene.

The walkway is over 120 ft. long, and the width varies from 5 to 8 feet. All the rules for walkways were thrown out, rules for steps were thrown out, pretty much all rules were thrown out. In the end it was all about the aesthetic, the visual, the experience.

Sunday, November 26, 2006

An Appreciation of Stone 18

A Sandstone Bench
This sandstone slab is just over 9.0 wide and about 3.5 feet deep. We used a tractor with extended forks to set this slab. After it was set I did some facing on the stone to create that interesting edge.

The slab came from the discard pile at Briar Hill Quarries, which is located in nowhere, Ohio. It is truly out in the country very close to Glenmount, Ohio. The folks at Briar Hill are good people. If you call and get Rusty tell him Rick Anderson said hello.

Sunday, November 19, 2006

An Appreciation of Stone 17

Sandstone formation in Southeastern Ohio.

Thursday, November 09, 2006

Backyard Patio story continues.

Single water falls, and tan sandstone walkways
More on the previous post. This was the 1st plan view color drawing that was shown to clients. Take notice that in this conceptual drawing there is only one waterfall, and the walkway is tan in color. the homeowners looked at this drawing and were very impressed.

I then remember them . . . starting to study the drawing and going over ever detail. It was decided pretty quickly they didn't want brown sandstone for the walkway-they were positive about this.

2nd they were very concerned that the one falls would not make enough noise to screen out the eat of the neighborhood noise, and would only one waterfall be loud enough to hear in the kitchen, and breakfast nook.

Normally, I would just show them a different color of stone (actual stone piece), and take some overlay paper and draw the other falls in the hillside. That wasn't going to work here, they wanted to see another drawing (specifically the wife).

So, I called the contractor and said I had to do another drawing for the homeowners, for x amount of hours to do the work (which he hadn't agree to pay me for). He asked me if they were excited about the conceptuals and were they close to jumping in?

I said; heck yeah, they're ready! . . . .

So the previously posted drawing is what they looked at, and of course they jumped in, over original budget request . . . because it was everything they wanted, in a logical layout, and the best parts could be enjoyed/viewed from inside the house.

Color rendering of pond and fire ring
Along with the plan view rendering, I showed the clients this conceptual rendering of how this area would relate to the new kitchen addition.

The addition is shown only in black line. I was trying to present the landscaping to add to the backyard, which is why my stuff is in color. We needed to excite them about tha landscaping, Heck they had already agreed to add the kitchen-no need to promote that.

I did; however, have to show how the new landscape would relate and enhance the new space. This rendering does a much better job than anything I could have done on a plan view drawing.

This drawing was the deal-clincher for this side of the backyard. I basically laid this on the table and it was over. Let's go, let's put it in, we can't wait . . . those were the comments.

I've said this before, and will say it some more (hey, I'm a poet!), if you design hardscapes, structure, level transitions, etc . . . you must render. This is the only way to really communicate what you are trying to achieve to the client.

Has for this drawing, I'll have more on my evolution as a designer . . . tomorrow.

Tuesday, November 07, 2006

Color; Plan View Drawing

More on yesterdays Hardscape Plan
Now we can take a look at where that sandstone walkway goes to. The bridge leads directly to the fire pit area, in a very enclosed area.

Just above the fire pit is the mound with boulders and plantings. To the bottom side the pond surrounds the fire pit. I was trying to create this very intimate space for those who wanted to wander over to this area. While the paver area was more of the public type area.

The homeowner had specifically asked for two separate areas so the adults could gather in one and the kids in another.

Everything was designed with this thought in the back of my head, remember the view from the new kitchen addition . . . remember the view from the new kitchen addition. You can see the breaks in the house line where the windows were being placed . . . there are a lot of them, and we wanted something interesting happening wherever you looked out.

This was taken the 1st winter of the garden. I took this photo with a zoom lens while standing inside the kitchen. Where the window is rounded off they have a breakfast nook set up there.

I think it's a pretty nice look while your sipping on you morning cup of joe, and having a bowl of Cheerios. What do you think?

The falls originate in bio-falls boxes, and I always used 45mil, EPDM liner, covered in stone-usually 3-5 different sizes. I believe this helps with creating a more naturalistic waterfeature. One other thing about siting waterfeatures . . . I like having some sort of evergreen back drop for my falls. I think a good solid screening backdrop helps with selling the realism of the waterfeature.

I am also a sucker for low weeping plants around streams. Plants the branch out over the water, or crawl down into the waters edge. It's more of the blending between land and water to create a; sort of, seamless edge.

Sunday, November 05, 2006

An Appreciation of Stone 16

A Babbling Brook
This is part of a series of small falls, that tumble down a 6 or 7 foot embankment. The stone used is a West Virginia fieldstone. A nice gray color with some mineral veins running through the stone to create some real interest.

Because fieldstone is aged, tumbled, rough it makes great stone for waterfeatures because it shows that aging that you are hoping for to sell the naturalism of the waterfeature. To give it that; hey it just might be real.

Friday, November 03, 2006

Sandstone Walk, with Paver Patio

The journey continues, from Yesterday
Coming off of the Paver patio the walk through the garden continues on the sandstone walkway. To a bridge made of antique curbstone. Pond is on far right. Fire ring area is across the bridge and double waterfalls are on the left.

That mound is artificial. It was built for falls and streams and to add sense of enclosure to the seating area. More on this later.

Thursday, November 02, 2006

Hardscape Design

Continuation on Monday's post
This image is just a pull back from Monday's post and gives you a better idea of how that smaller circle works. The sandstone slabs in the foreground continue to where the gate opening is to enter this garden.

What we are looking at here is what you(the observer) sees when 1st entering this garden space.
A few more steps and a look to the right is where the double waterfall, stream, pond, and fire pit are located.
The direction we are looking back to is where the 1st photo was taken from. I would say we can now appreciate the size of the main circle. This patio space had to be large enough to hold a 6 seat table, a couple of small benches, a chaise lounge or two, and a grill whew!!! A lot of stuff.

Plus enough room to navigate around all this stuff without feeling pinched in, cramped, stumbling over each other.

Right at the very bottom of this photo you can see a different color of brick. This is the landing step coming out of, or going into the kitchen. That brick work is all mortared, and the patio is dry-laid on limestone stone dust.

Ohh, one other thing, see that little bit of sandstone to the bottom left, that was specifically designed as a space for the grill. Convenient to the kitchen access, but completely out of the way of foot traffic and other patio furniture.

Sunday, October 29, 2006

An Appreciation of Stone 15

Hidden Millstones
In the above photo the unfinished millstones (grindstones) are sitting in stacks so high, long, and deep it almost looks like the rockface of a hill side. This must be where stones were stored before finishing, or heck, it could be a pile of seconds.
The shape and the outline of the stone is much clearer in this image. The way they're stacked with the outline that is showing (the tracery) . . . this could be a sculptural installation.

I really like how the stone jut out of the hillside, the randomness of the stack, and the shadow lines. It is in those area's of darkness that make the light more pronounced.

The interplay of those elements is a powerful tool in the designers toolbox (How's that for a cliche' ???). The added height of interest, and mystery is great.

Sunday, October 22, 2006

An Appreciation of Stone 14

These Gate columns were laying in the stone yard of a demo/excavator not far from where I live. What I would like to point out here is the level of craftsmenship for the joinery.Including the openings at the top of the columns to accept a decorative cap.

The finish on the columns which has darkened over time from exposure to the elements stops where the stone was buried in the Earth. This is also where the mason stopped working the stone. time being needed to move on to the next project.

Tools today would allow us to cut and face the stone faster, so in this day and age columns are cut smooth their entire length, usually on a diamond embedded saw. The above columns would make great gates, markers, entry columns in today's gardens.

Saturday, October 21, 2006

A Stonemason's website

 I have been meaning to put up a link to The Unturned Stone for a while and haven't gotten around to it till now. The photo they have up on today's post was the final straw. If that really is the look out of their office . . . then wow! what a view.

They don't post a lot but what they do is worthwhile. Go back in a take a look at some of their work. These guys really know how to put stone together

Sunday, October 15, 2006

An Appreciation of Stone 13

Waterfall, approx. 2.0' high

 The combination of very large stones, medium size, and smaller stone is what helps bring realism to this setting.

Sunday, October 08, 2006

An Appreciation of Stone 12

Setting the Big Boulders !!!!

Now this is fun . . . . More shots of this project at my web-site

Wednesday, October 04, 2006

Sectional, and Plan View Drawing

Sketchbook drawings, on-site

These conceptual drawings are from the same job site as yesterday.  Yes, I know  . . . I wrote yesterday about 
using a green marker for plant material, and boom! here we are showing plants in brown. Well it is the only 
marker I had with me on-site.

The top drawing is a rough plan view drawing of the site and the lower is a quick elevation drawing of the
site. If I remember correctly I drew the plan view drawing 1st then the elevation. On-site I would say I draw
the elevation 1st about 75% of the time. Even more than that if the client is standing there. After all this type of landscape rendering tells the real story.

The follow up of the plan view shows spatial relationship. The circles  for the plants are rough and fast, the idea is to show that I am looking at several varieties, and of several sizes. The elevation drawing even better shows the plant differences and height variations.

At no point though are we specific on the varieties. The only specific is the use of barnstone for the wall, and that there would be a terrace designed above and slightly back to the left.

p.s. This design did not go in. The owner was given a deal on a Unilock display, and since they are a Unilock dealer that's what they put in.

Sunday, October 01, 2006

An Appreciation of Stone 11

Waterfall in Winter

This waterfall shot was taken right after completion and the weather had just turned
 real cold, real cold. The falling water, the snow and ice. Gotta love it. 

Sunday, September 24, 2006

An Appreciation of Stone 10

Somewhere in Southeastern Ohio

300 million plus year-old sandstone formation. The younger sandstone at the top
 is harder than that below, accounting for the awesome overhang.

I also appreciate the interplay of light and shadow, something all designers should work for.
Though we rarely get to work at this scale. From the top of the ledge to bootm of the
"hollow" is over 90 feet.